[Guide] Homatics Box R 4k Plus CoreELEC installation, configuration and modding

Wanted to post a teardown guide for anybody uncertain about opening theirs.

First unplug any I/O from the device such as usbs and whatnot. Flip it over, and remove the two rubber feet on the opposite side of the usb c port. These really aren’t glued down, so no worries about them not going back on the same. This should expose two philips head screws, remove those.

Next flip it back over, and the top should naturally be more seperated than normal. Using a pry tool, or in my case I was able to just do it with my fingers, carefully pry the lid up. Slowly open it, and remove the ribbon cable for the light bar.

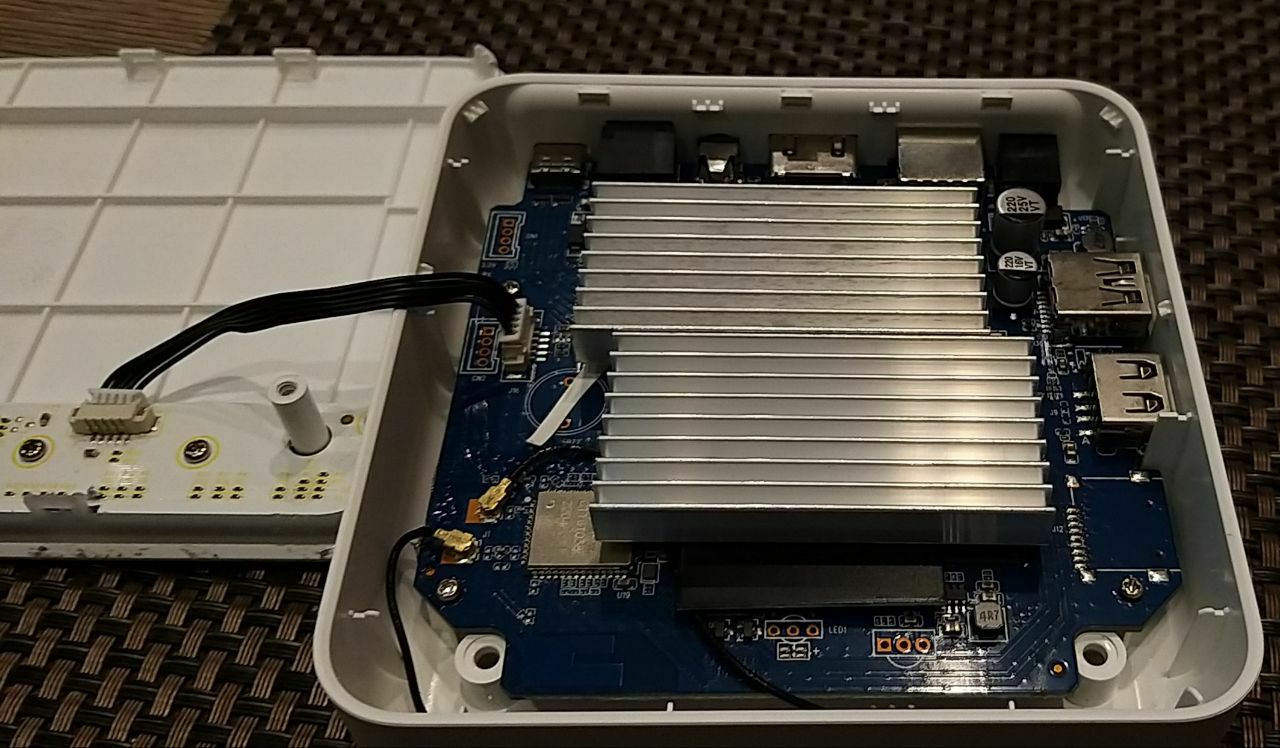
Next your gonna see the insides. If yours is similar to mine, be careful with the step after this as the wifi antennas are glued in on both ends. I’ve seen these connectors break, so it’s best to just leave them in, we can work around it. Remove the four screws, in my case I was missing a screw I’m not sure if that’s normal or not but I highlighted it in the photo.

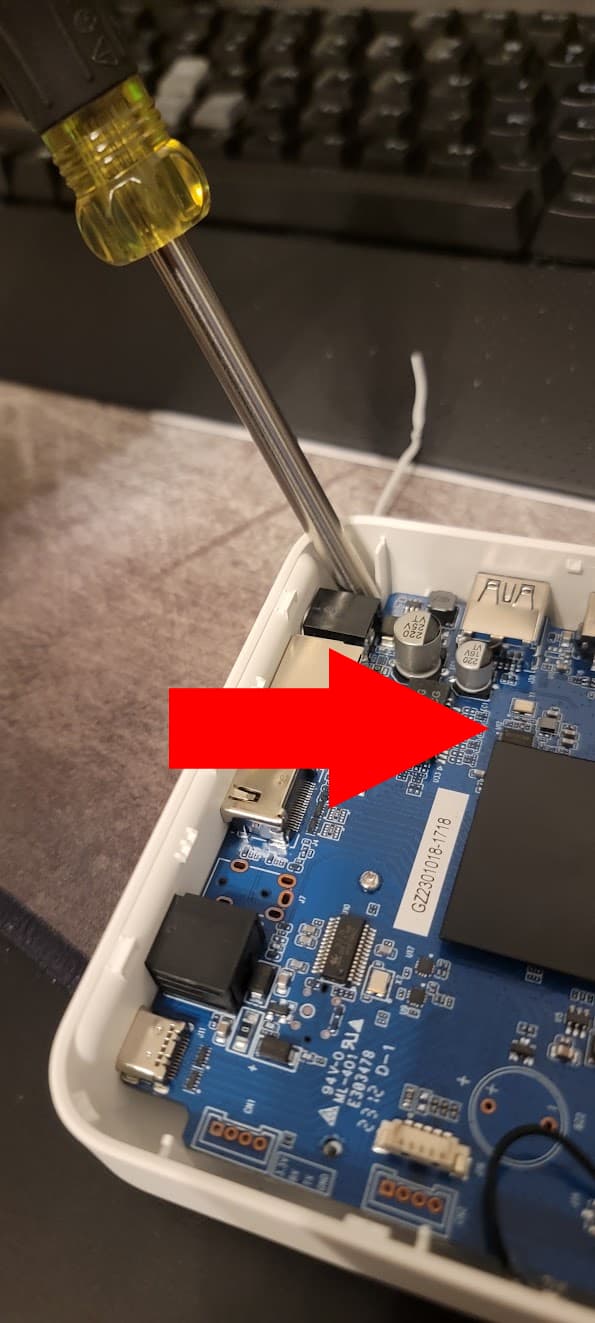
Next up we have to remove the mainboard. There’s several ways of doing this, just keep in mind some force is needed as there is a thermal pad below which is adhesed to the backplate so that will be fighting against you. The I/O sits flush in the case, so your also having to work with that. I just shoved my screw driver in the empty area near the power jack and pushed away. Check the next step before pulling the mainboard out after you get it free.

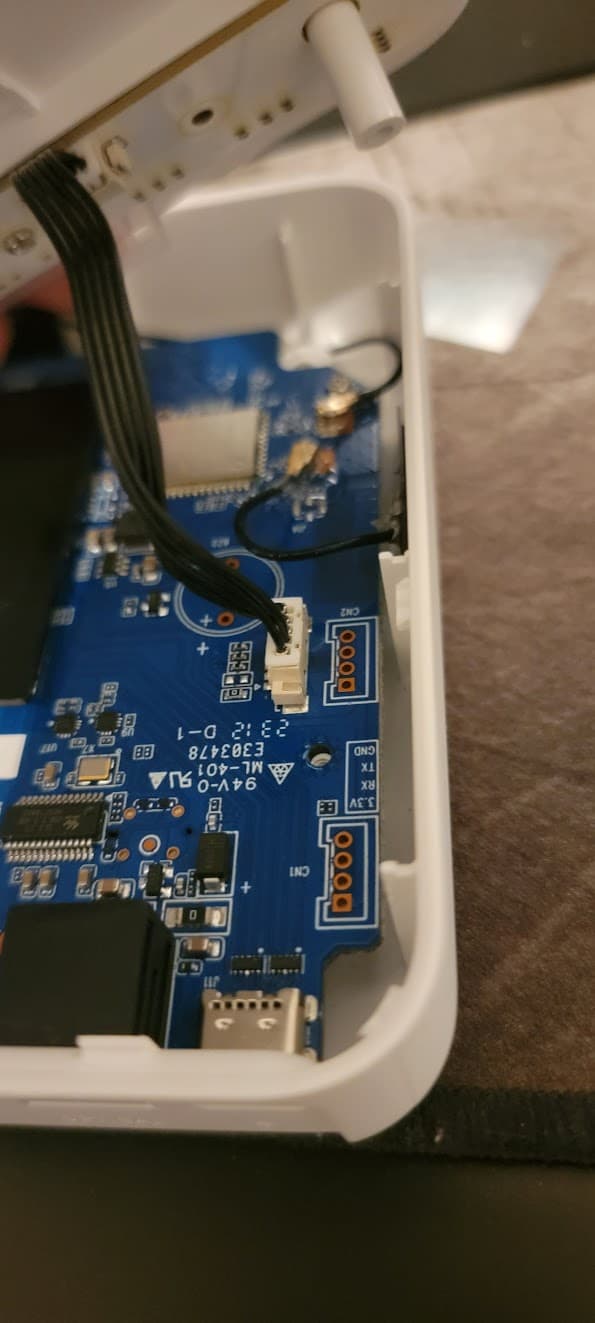
Once you free the mainboard, careful flip it over as I did in this photo. Like I said earlier you have the wifi antennas to work around, and as this backplate is magnetic I used a office pencil organizer which was metal to hold it up.

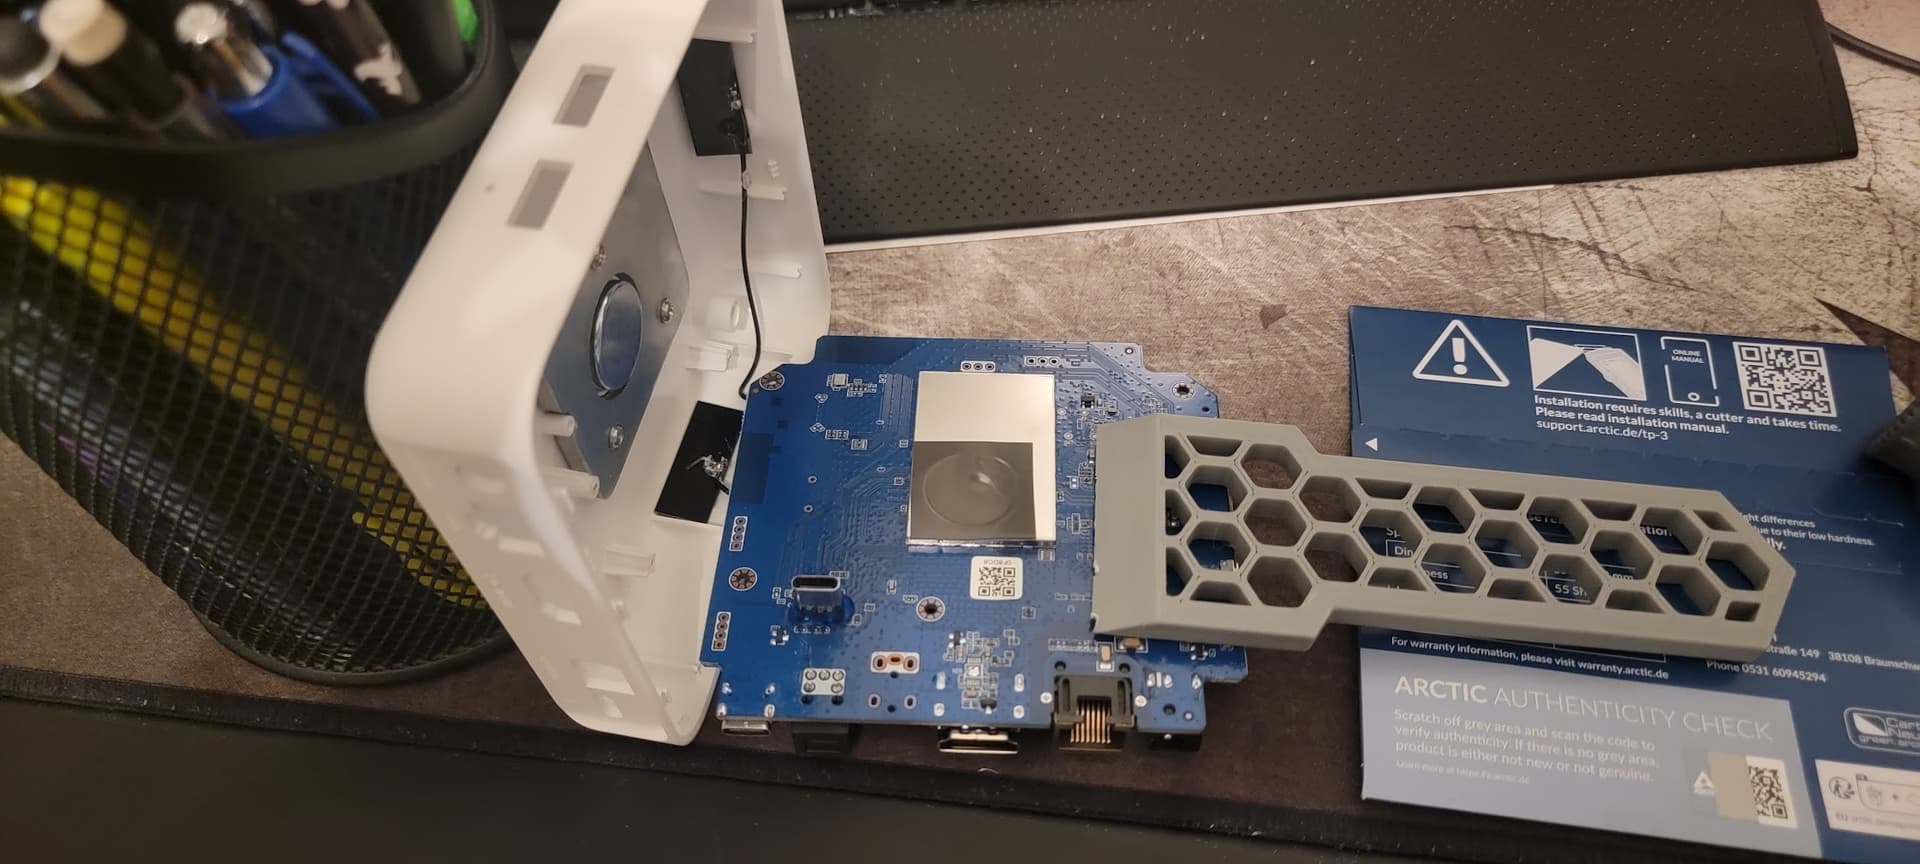
Now I went ahead, and removed that weak thermal pad using a plastic scraper and replaced it with a arctic .5mm pad in the exact size of that metal shield. If this is your first time doing something like this, carefully scrape away the thermal pad using a plastic scrapper or even your finger nail, seriously mine just came right up like a slice of cheese. Just whatever you use be careful not to scratch the shield. Use some isopropyl alcohol, >91% and rub it on the shield to clean up the surface. Then your good to replace the pad with the new one.

Reassembly is just this but backwards, when putting the mainboard back in remember how it came out, as I pointed out the I/O has to go into the backplate, so your gonna have to push it in the way you pulled it out. I hope this guide is some help to somebody. This box is extremely easy to teardown, and no pesky warranty stickers to scare you away.

1 Like

Then you can easily put one two alu heat sink top of the black platte in mainboard.
60x30x8mm. 1=2 usd in Aliexpress

1 Like

This was going to be my next solution actually, how’s your temps?

would you please share with us the linek that you bought from Aliexpress heat sink? after that how’s it temps?

https://www.aliexpress.us/item/2251832787166258.html looks like this one

thank you. do you think it will be useful to use it?

Was 8-10°C cooler…

nice. so, it’s useful. How did u install it?

There is Heat Sink Alumininum, with Thermal Conductive Heat Transfer Pads, which 2-sided adhesive.

I have super high hopes in this mod, more than the thermal pad I did prior. I had the top of the homatics off for testing one day and the temps were crazy low. I went and ordered that and a few other heat sinks off ali last night, didn’t realize how cheap they were haha

Hello everyone, I have is box r FW 4674. I am trying to install Coreelec but I always get to resize file system. I tried with different versions, different USB ports, different USB Devices. How long should it take I wait for it 15/20 minutes. If I do a forced restart, I get a message about a damaged file system, after its repair Coreelec It starts.
I don’t have an update for Atv for now, I’m hoping to get into the Beta program on Monday.

Update to lastest version first (5310 or 5554).

1 Like

I just set one of the Dune boxes up and have CE 20 running on it. I’m doing the LLDV trick with an arcana. It’s set to scaler out 12bit 4:2:2. LLDV 400 nits, hdr 250 nits. Everything seems to be ship shape other than after it plays any HDR file, the menu gets super washed out, and the arcana OSD indicates that now it’s in REC709. Subsequent HDR files go back, but any SDR files get all sorts of goofy colors. If I reboot, it can play SDR scaled up again. What setting am I likely missing that’s not forcing it to stay in LLDV all the time?

Your display support 12 bit?

how edit “01-device-suspend.power” to use without install data in internal storage ?
i want use fix suspend for USB3.0 & external ssd

I did my heatsink mod a little different, and as Boulder pointed out you do need to be cautious of the placement as the led board is in the way, and part of me was debating on just removing the led board all together for optimal cooling but whatever. I’m going to check thermals later, but I wanted to post below how to install this heatsink. Use my instructions above to tear it down, and place the heatsink just barely above the wifi chipset, highlighted in blue, and as far to the right you can go without hitting this chip that says X2, highlighted in red.

Frodo19, looking at your install I’m a bit worried your top heatsink may not be optimal, as I attempted to do it that way but it hits that X2 chip that I pointed above. In my install, maybe a differnt sized heatsink would have been better as I am missing some of the spreader, but it’s a spreader, so I shouldn’t be loosing too much. The top cover felt more snug to put on after? I don’t see any buldging, and I like this because i feel it’s sandwiching everything together and putting more pressure between the pads.

EDIT: This is the one I had ordered, https://www.aliexpress.us/item/2251832787166258.html and it came preapplied with a .5mm thermal pad. I’m not sure on the quality of this thermal pad but I used it anyways.

And where is this new FW?

Android forced an update today for me and now coreelec does not boot anymore.

Help.

Have you tried to reinstall by Reset Button method?

Thanks, that did it !

Maybe add this as note in the first thread ? e.g. Needs to be repeated on any android update.

Android did not give me any chance to cancel the upgrade, instantly moved to “Update in progress don’t turn of the device…”