DIY Thermal Modifications

I hate fans, and try to do anything to avoid them…

3 Likes

A USB fan is likely to be a poor choice since its a fan designed to run at 5v and so is running full speed. A 12v run off a USB is running at the edge of stalling so is very quiet.

Shoog

I won’t bother with a fan or any cooling. It goes up to 74, it works ok at that.

1 Like

My experience was that thermal throttling kicked in at 70C. The way to test this is to set the governor to performance in CE settings addon and then use the information panel to watch the CPU clock speed. If the clock speed changes then you are seeing thermal throttling.

Shoog

DO NOT BUY A X96 MAX+
This box has a horrible thermal design and they redesigned the motherboard new and moved the processor but still are using the original case so the 4 mm thick heat transfer pad has only 60% contact with the sheat metal heat sink.
This results if you use it as an Android box in temps over 83 C /182 F and a reset / reboot in an 23 C 74 F environment just by Kodi doing database work or watching a sinmle HD clip.
Here is the old design with external antennas and the new design with integrated antennas.

the old and the new design

Since you can not rotate the metal plate you need to rotate the bottom 180 degrees and you den up with something like that.

OK this is all shit and first we need to get the heat out of the case, since these geniusses put the board upside down in the case all the heat gets trappedin the processor area and the holes in the bottom do nothing since there can not be any air movement.
So let´s get constructive destructive…

1 Like

We start with the processor heat transfer first.
Throw away the stupid 4mm silicone pad and put some heat transfer paste on the processor. Then we take a 10mm x 30mm 3mm copper M2 SSD cooler what we have left over from screwing around with an apollo lake ultra book.
Over that comes a very thin double sided thermal transfer tape to keep the sheet metal in place.

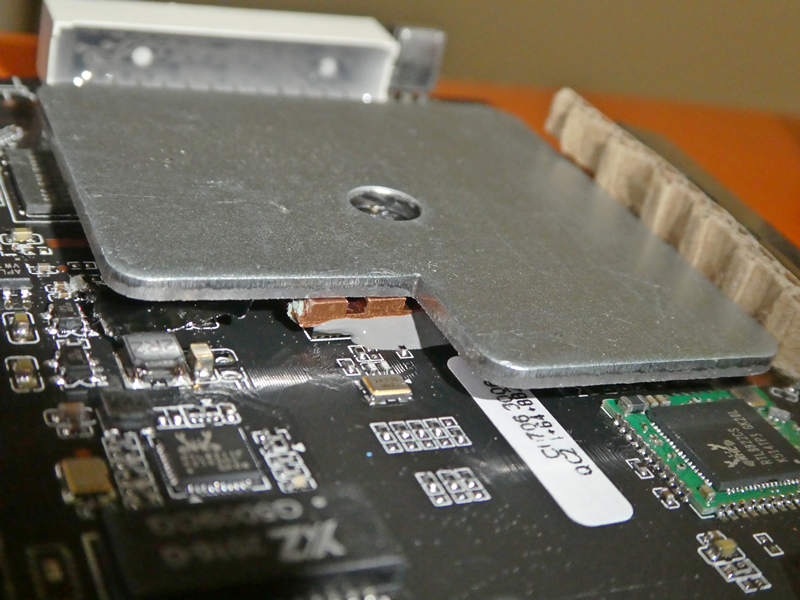
No we need to keep pressure directly over the processor. This is done by 3 washers what sit around the mounting pin of the sheet metal cooler.
but this brings the pressure not directly on the processor so the mounting pin meets the dremel.
Then the 3 washers are getting reduced to 2 and since I drilled a bunch of holes into the bottom earlier to test if just simple swiss cheese methode would work (it did not enough) the 3rd washer gets replaced with a 1mm slotted aluminum plate (remember the apollo lake, a leftover from my heat sinking there).
The washers get held in place directly over the processor by some aluminum sticky tape.


pictured the 3 washer stage.

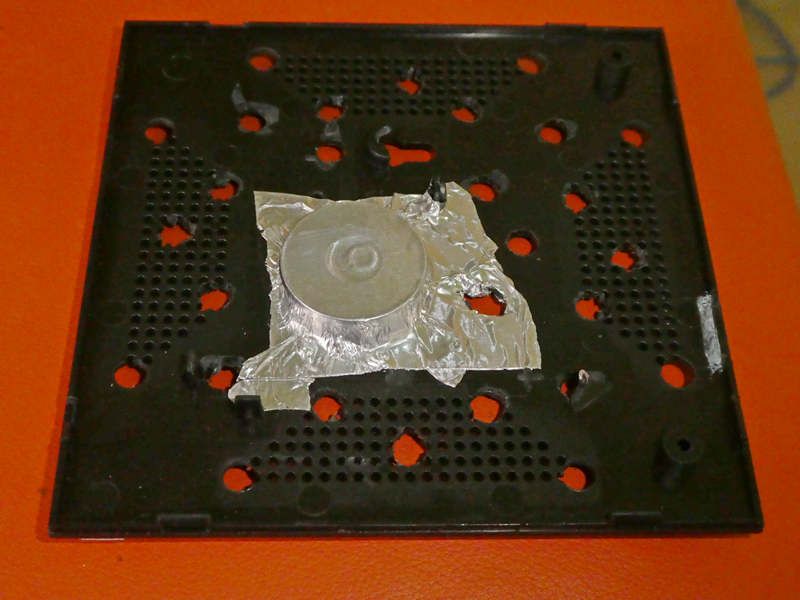
The top gets the swiss cheese treatment since I found out that the topside from the board produces quite some heat too.
I wanted the look not too butchered up so I used some mounting band what has nice holes in equal spaces.
Also the logo should be not holed.


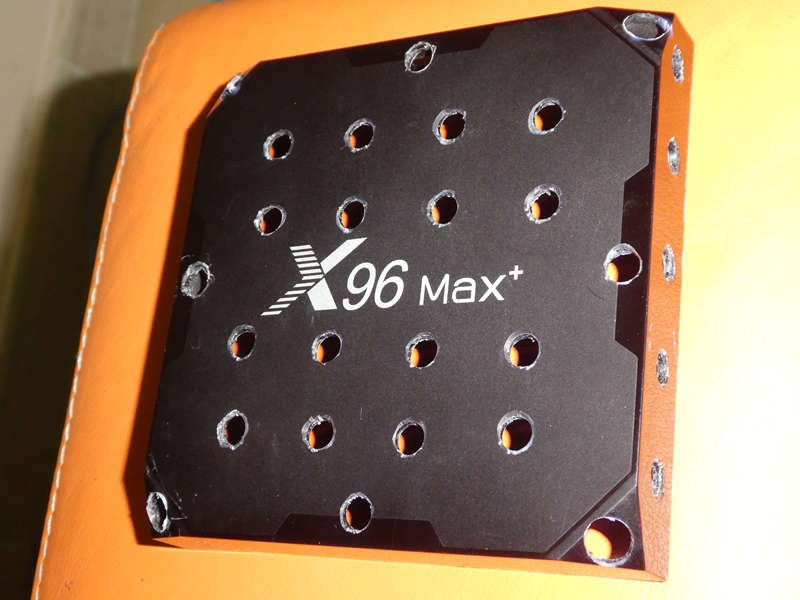
the holes were smoothed later on.

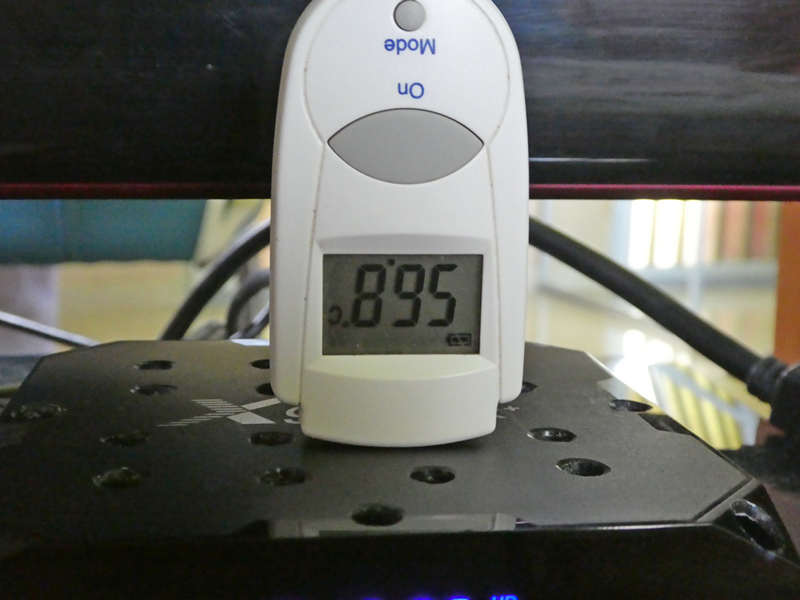
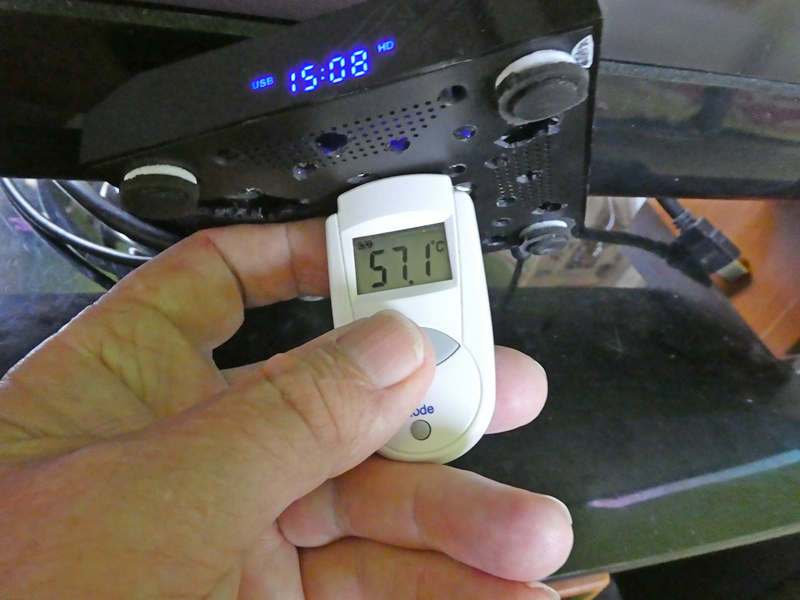
WIth this setup the box reaches 75C 167F playing for half an hour in a 29C 84F environment.
We are still takling under Android where the box runs between 80 and 100% Kodi processor load.
In CE we are at 60 C 140F and in cooler room conditions, around 22C 72F, the box runs 10C 50F cooler.
The inside of the box runs now with acceptable temps.
Both measured through the air holes onto the board in Android under load.

The bottom also got some feet extensions so there is now a good, and with the hand over the top noticeable, air movement going on.

Aliexpress got a claim that I get 19 Euro from the 38 Euro price back.
(I forgot that there was a keyboard what made the price a bit higher, so I might settle for 15 Euro back, for my work)

If everything works as it does now, I will glue some black fly screen from the inside to keep the bugs out of the box.

By the way, since the sd card slot just runs slow usb 2 speed with 25/18 RW I copied the sd card onto a 64GB Sandisk Ultra Fit usb 3.0 what runs over the 4 port hub with measured 140/50 RW.

2 Likes

In case I need more cooling, I ordered 2 double raspi coolers which I can devide, since 1 cooler with one fan should be enough for the android box.
At a price of 4.65 Euro for 4 fans, I could not resist.

the size of a devided unit is 25mm * 25mm * 13mm and uses 0.75 W on 5V

The fan would just stick a few mm out of the case and could be covered with a Stainless Steel Sink Strainer for a fancy look and to keep bugs out

2 Likes

Sorry very noob moder here…

Would a kit like this, plus some holes drilling do it for the X96 Air?

Unsure about the height, it is 6mm, will it fit?

Or will i be better of going with a bunch of small heatsinks?

h1

Bigger is better. Those sorts of sizes will simply add thermal inertia but wont stop the chip getting to throttling temps.

Shoog

Am i getting close? I prefer not to completely cut the case.
It is 38*38 and 6 mm high.

Thats going to be better, but good air flow is also essential.

Shoog

Go even bigger? I will make some holes over and under the soc, for better air flow.

Without those holes your probably wasting your time, improved air flow is more important than a big enclosed heatsink.

Shoog

Also fit some higher “feet” to allow for better air flow.

Will do, thank you all for your good advise, will up some pics when i am done.


:+1:

1 Like

Not DIY, but do you think it will help?
Router fan DIY PC Cooler TV Box Wireless Cooling Silent Quiet DC 5V USB power 120mm fan 120x25mm 12CM W/Screws Protective net

Would do but you also need to introduce some air flow into the case, a few strategic holes.

Shoog

Fan ordered. I will test when get it. I hope I won’t need to make additional holes to decrease temperature

Taller rubber feet will also make a difference, allowing better airflow below the box. I got these at a dollar store. You can see the originals in the centre of the box for a comparison.