Required:
-
Android image suitable for the device to be recovered – can be found here X96 MAX Firmware Links | Welcome to the DroiX Forums
-
uSD card … a small capacity card will suit – 4GB or greater suggested.
-
The extraction binary aml_upgrade_package_extract
aml-upgrade-package-extract (12.8 KB)
SourceCode: GitHub - Portisch/aml-upgrade-package-extract: tool to extract Android image
Method: Prepare a uSD card with a single FAT32 partition … but with unallocated free space, of 16MBs, before the start of that partition as shown in the following image. This space is to facilitate the installation of the bootloader on the uSD card.

Download suitable Android firmware for the device (usually in Zip form). Extract the Zip file and find the aml_upgrade_package.img .
Run the aml-upgrade-package-extract binary against the aml_upgrade_package.img file.
#aml-upgrade-package-extract aml_upgrade_package.img
This produces a lot of files but of interest are
aml_sdc_burn.UBOOT
aml_sdc_burn.ini
and the original aml_upgrade_package.img
Put these three files
aml_sdc_burn.ini ( NOTE : Edit this file first … see below)
aml_sdc_burn.UBOOT
aml_upgrade_package.img
on the FAT32 partition of the uSD card.
Next write the .ini and .UBOOT files to the bootloader section of the uSD card (the free space left before the partition) by doing the following in a terminal …
Do as root (change the paths for ‘if=/PATH/’ and 'of=/dev/sd? to suit the environment being used)
dd if=/PATH/aml_sdc_burn.UBOOT of=/dev/sd? conv=fsync bs=1 count=112 && dd if=/PATH/aml_sdc_burn.UBOOT of=/dev/sd? conv=fsync bs=512 skip=1 seek=1
The card is now prepared for use to recover the box.
Recovery:
It is necessary to short two pins on the back of the device PCB, with the display attached, the card inserted, and then apply power, to get the bootloader of the uSD card to be used.
Release the short as soon as the display shows the Android icon.
This pic shows the pins on the X96 Max that need to be shorted out.
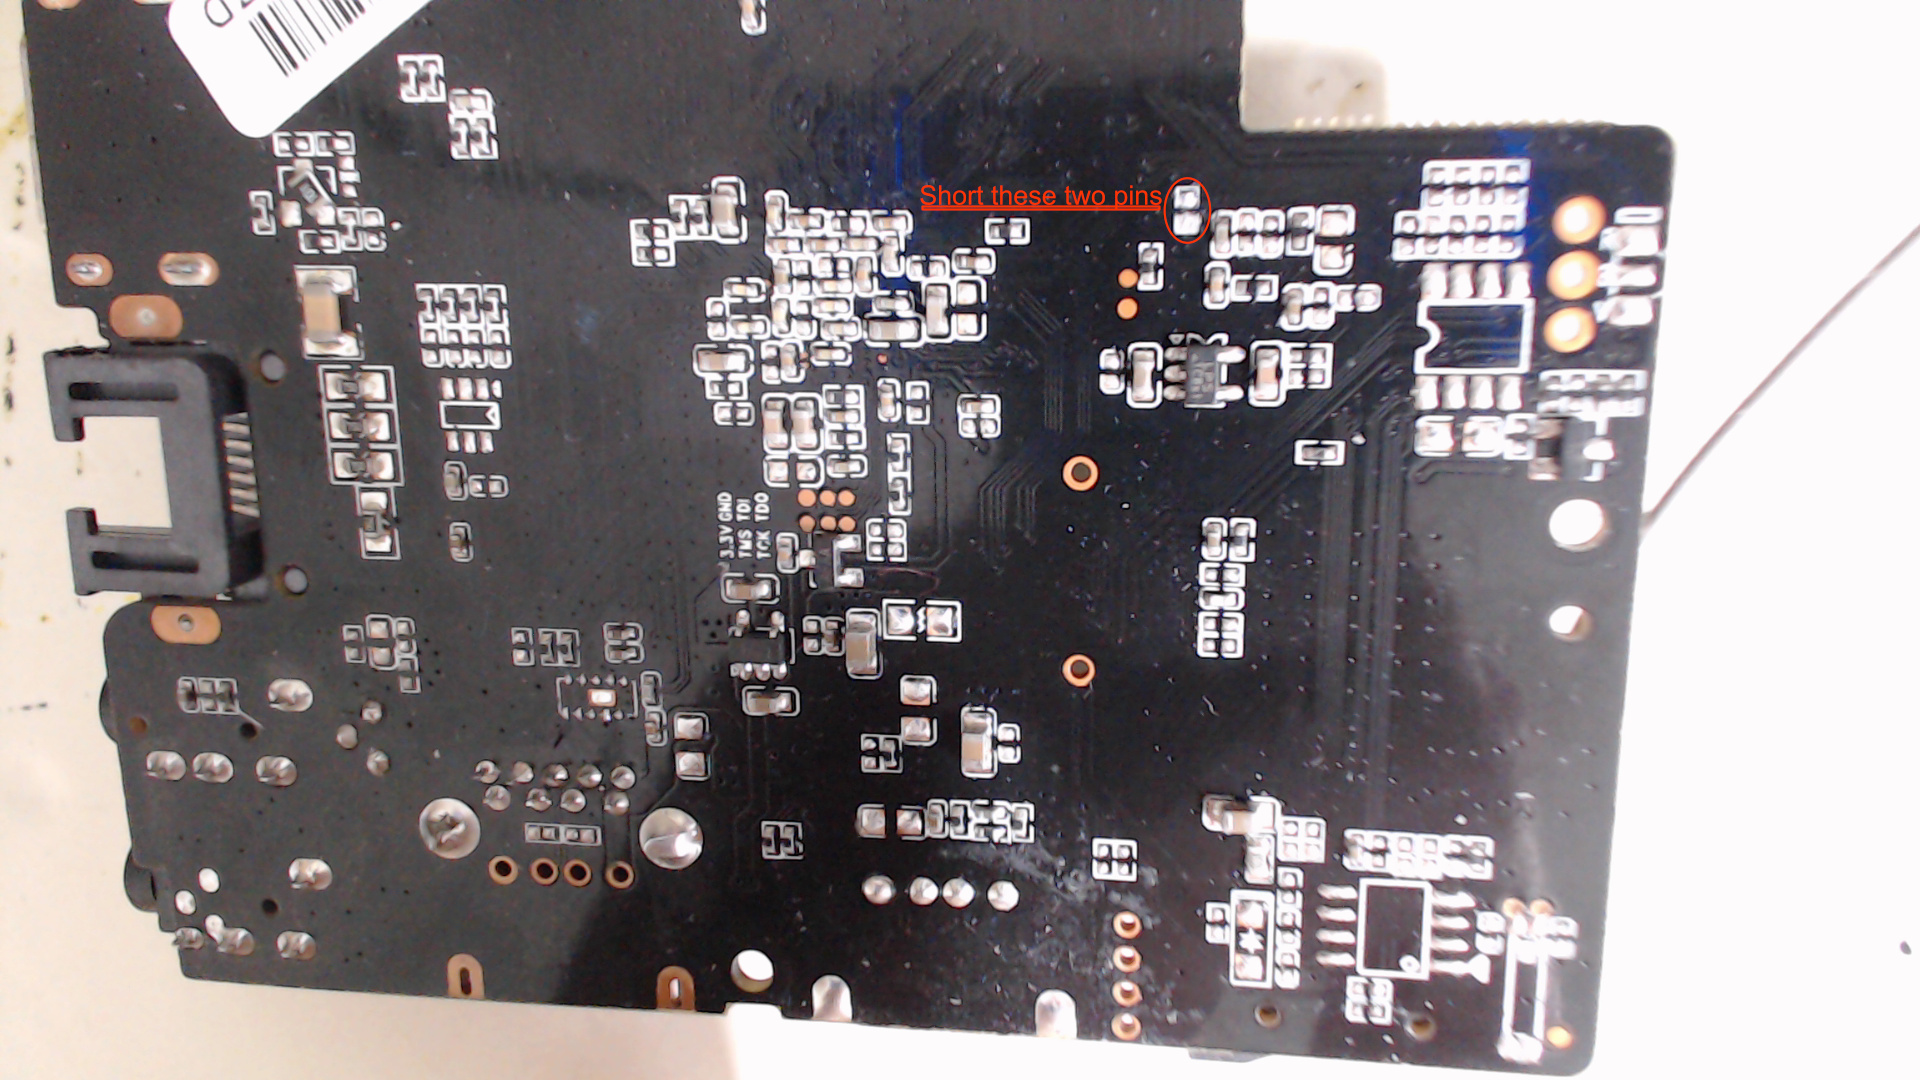
It took multiple attempts for me to succeed … I suspect my ‘short’ was not making properly at times.
When successful the screen shows an Android icon and
… UPGRADING …
It takes some considerable time to complete, and Android boots immediately it is completed.
It is necessary to set up Andoid before it gets used … locale, time etc.
Android then functions ‘as new’. Now the uSD card can be used to install CE again once the new CE image is written to it.
. **************************************
The aml_sdc_burn.ini file was edited before use
from:
[common]
erase_bootloader =1
erase_flash =0
reboot =0
to:
[common]
erase_bootloader =1
erase_flash =1
reboot =1
Check that the entry in the .ini file is specifying the correct .img file name … package =aml_upgrade_package.img
This post was only possible due to the involvement of @Portisch who not only provided the extraction binary but also provided instruction and help along the way. So THANK YOU sir. ![]()