Compatible Devices:
Supported devices by CoreElec Team: List
Details and Pictures of the devices: AVS Forum Thread
Requirements
- Android TV v5310 or higher for working Dolby Vision
(see FAQ for upgrade instructions)
-
fast USB Stick / USB SSD
( this will be the main boot drive ) i reccomend: Samsungs FIT Plus USB 3.1
- flashing tool like Balena Etcher or Rufus (Win only)
(this is used to flash CoreELEC image onto the USB Storage )
-
CoreELEC 20 amlogic-ne GENERIC image
(This is considered the stable version ,based on Kodi Nexus )
-
CoreELEC 21 amlogic-ne GENERIC image
(this is the bleeding edge version ,based on Kodi Omega which is still in Alpha stage ,so don’t complain if it’s buggy ).
-
Sim Tray Tool / Toothpick
(or any other tool that you can use with the device’s reset pin hole)
-
Enable CEC on your TV
(this is optional,but i recommend to enable CEC so you can do the CoreELEC’s initial setup easily ,using the TV’s remote control )
Preparing Installation Drive
- Connect the USB Storage to your PC and open flashing tool (eg Balena Etcher)
- Select the CoreELEC’s image file (eg.
CoreELEC-Amlogic-ne.aarch64-20.3-Nexus_nightly_20230729-Generic.img.gz )
- Select the USB Storage that you want to use, proceed with the installation.
- Verify that the flashing process was successful
(Balena Etcher will do that for you in the Validation process [green bar])
-
- Your USB drive will now have two partitions ,COREELEC and STORAGE
-
- Open the COREELEC partition ,navigate to
device_trees folder
-
- Copy
sc2_s905x4_sei_smb_280.dtb file to COREELEC root and rename it dtb.img .
-
- Safely remove the USB drive from your PC
CoreELEC Installation
- Insert the USB drive in the Homatics’s USB3 port (blue)
(USB3 is faster / USB2 had Suspend )
- reboot/boot the device into UPGRADE MODE
Simple Method / Restbotton
-
PowerOFF the device and remove the DC power connector
(or remove the power adapter from the wall socket )
-
Press and keep pressing the reset button,
then Power ON the device while keep pressing the reset button
(hold even if menu / fastboot is shown).
-
Release the Reset Button (if you see the CoreElec boot screen)
Advnaced Method / ADB (only from AndroidTV)
-
enable ADB in Android
(make sure ADB Debug is enabled and working )
- Run the reboot command with update parameter
adb reboot update- wait until you see CoreElec boot screen
- follow the initial CoreELEC on-screen setup
(For working Remote see FAQ / CEC requirements )
Troubleshooting :
You have followed all the steps from this guide but CoreELEC is still not working.
Boot issues
- Try USB2 port.
- Double check that you have used the correct DTB and you renamed it correctly.
(see Requirements Step 2.)
- If you are using an USB HUB: try removing it and attach the USB drive directly to the USB port.
- try another USB Drive (usb stick,ssd,etc)
there were several reports about certain USB sticks or USB-SATA adapters not working correctly either this device ,even if they are fully working on a PC/Laptop or other devices.
(some especially old or often reformatted USB sticks have issues with their controllers)
[some vendors offer reset tools with which you can deep reset/reformat the usb stick and remove any kind of write protection or other settings but since its a controller reslash i wont link to it use google  ]
]
Known Problems
Original Bluetooth Remote (B21) not working after a reboot:
Solution : Press Back + Home buttons for 5 seconds and your remote should be working again
CoreELEC it’s not working after resuming from stand-by.
Stand-by is not officially supported on these devices,so i recommend you to avoid using it.
Can’t PowerON the device with the remote
Cause: Some of these devices don’t have an IR receiver ,so if you PowerOFF your device ,you won’t be able to power it ON with a Bluetooth remote .
Solution: Either use an IR dongle (eg. FLIRC) or avoid a complete shutdown of the device.
(i use a remote power plug for example tasmota with home assistant or use a wireless plug)
DolbyVision is not working
Possibile Cause:
- Your Android TV firmware might be incompatible with your current CoreELEC version.
(see Requirements)
- You might need to enable DolbyVision in Android TV before using CoreELEC
(eg. You never used Android TV after you bought the device and you went straight to CoreELEC installation )
- you need to enable DolbyVision support on your TV / Projector either in Settings or via Firmware upgrade
FAQS
Q1: Is it possible to install CoreELEC on the device’s internal storage ?
A: No,do to the nature of how CoreELEC works on this device ,it is not possible (and probably never will) to install CoreELEC on the internal storage .
However ,it is possible to use a sort of hybrid installation that will let you use the internal storage for the “STORAGE” partition ,but keep in mind that this solution is not supported by the CoreELEC Team,so use it on your own risk and don’t complain if you are having issues or data loss.
Here’s the solution ( thx @vpeter )-> Homatics Box R 4K Plus - #278 by vpeter
Q2: Is it possible to customize the device’s LEDS light?
A: While there’s no CoreELEC’s built-in option for that ,there’s a separate add-on that does that .
Homatics LEDs add-on → Homatics LEDs addon
Q3: I would like to reboot to AndroidTV by using a remote control button ,is it possible to assign that function to a remote button?
A: You can use this example ( thx again @vpeter ) to accomplish that .
Remember ,that’s only an example ,so you might need to adjust it for your needs.
Reboot to Android with remote control button → Physical button execute script - #6 by vpeter
Remote Control Configuration
- Homatics Bluetooth remote pairing
- Go to Settings → CoreELEC Configuration → Bluetooth
- On the Homatics remote press BACK + HOME for seconds (this will put the remote in pairing mode )
- Check if your remote is showing in CoreELEC’s Bluetooth screen ( usually is named B21,B25 ,depending on your model )
- Select the remote and press PAIR
- Check if CoreELEC is responding to the remote commands
NOTE : If the remote is not working even if the pairing was successful ,try to re-pair it ( BACK+HOME combo) or reboot the device.
NOTE 2 : If the remote stop working after a reboot/shutdown ,try to re-pair the remote (BACK+HOME).
Unfortunately this is a known issue and you will most likely face it when you reboot from CoreELEC to Android and then back to CoreELEC .
Currently there’s no fix or workaround .
- DuneHD Homatics Box R 4k Plus
If you want to use the IR (infrared) protocol of your DuneHD ,you will need a “remote.conf” file ,compatible with your remote .
Thankfully ,another user shared such a configuration file ,so you won’t have to create one yourself .
Copy the “remote.conf” file to “/storage/.config” folder and reboot the device.
To customize the remote buttons i recommend using the “Keymap Editor” add-on ,from Kodi Repository → Program Add-ons section .
Link to DuneHD remote.conf → Homatics Box R 4K Plus - #620 by aszi
- Nokia 8010 IR remote protocol with meson-ir driver
In the links bellow you can find the KEYMAP and the instructions how to use your Nokia 8010 infrared remote protocol with CoreELEC and meson-ir.
NOTE that the second link has a more complete configuration file ,so i recommend using that one .
Link 1 (more detailed instructions) → Homatics Box R 4K Plus - #985 by frodo19
Link 2 (fully working KEYMAP) → Homatics Box R 4K Plus - #1077 by Vex
Q4: My Remote is not Working
A: For Homatics Blutooth remote try to re-pair it
(pres & hold BACK+HOME until the green LED is blinking fast - when it stops blinking its paired again and should work)
For remote.conf KeyMaps see:
Nokia: Homatics Box R 4K Plus - #1077 by Vex
Dune HD: Homatics Box R 4K Plus - #620 by aszi
Homatics: Homatics Box R 4K Plus - #960 by vpeter
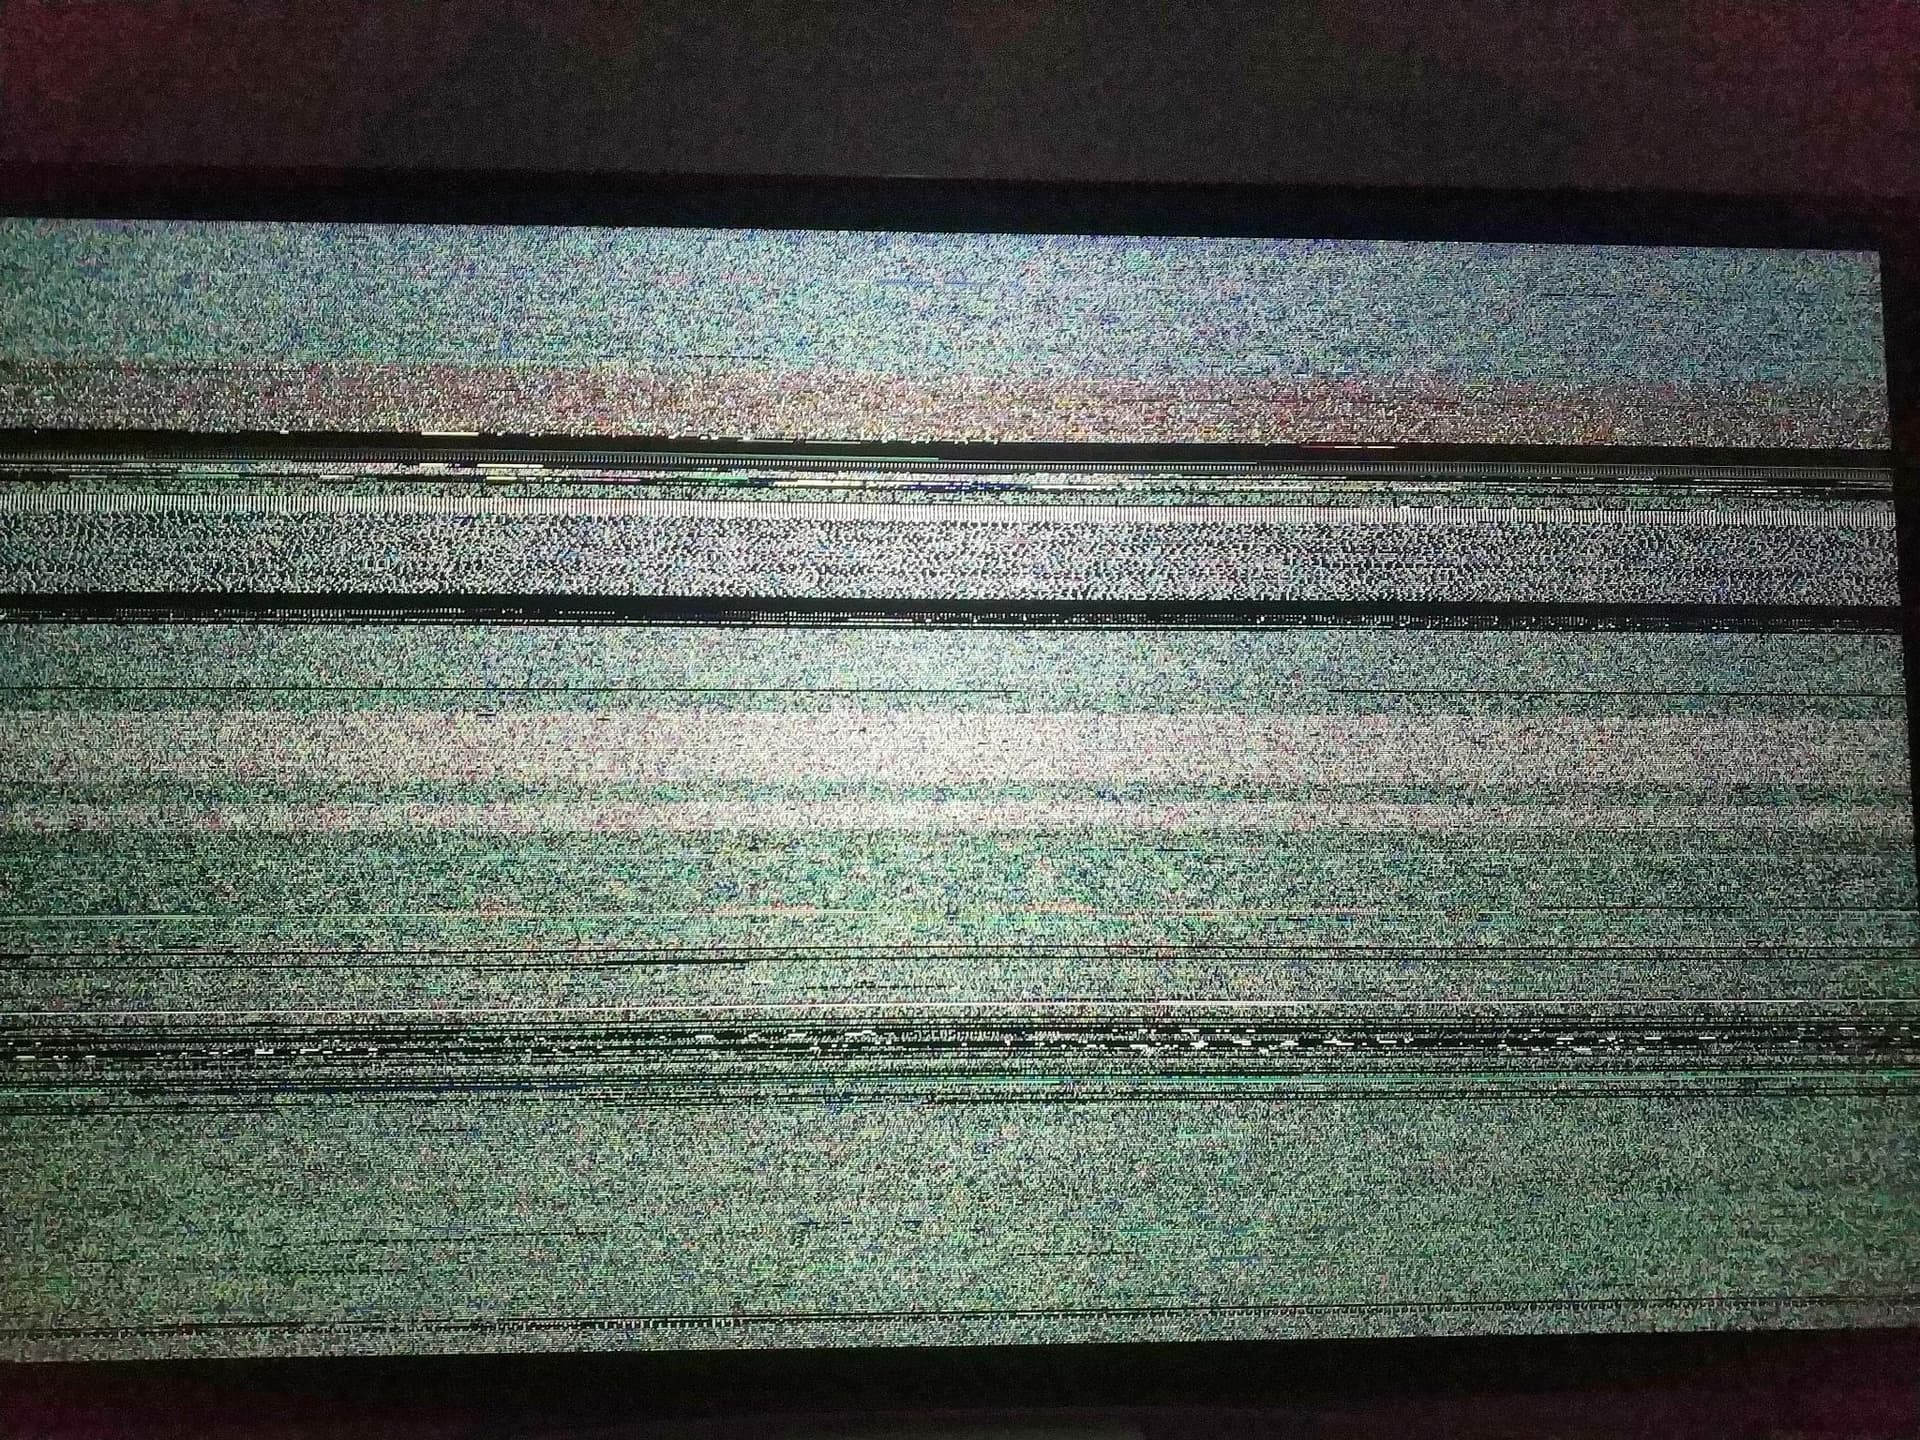
Q5: I have a distorted Screen after Boot
A: Always boot the Homatics box after AVR / TV
If you see something like the Picture below you HDMI handshare probably failed.
Make sure your AVR / TV are properly started before starting the Homatics box!
Q6: How to upgrade my Firmware (eg for Dolby Vision)
A: Upgrade the Android TV version.
- Boot as usual and navigate to your Power menu
- Select
reboot to emmc
- wait until Android TV is booted.
- upgrade like any other Android TV/Device
- login to android
- navigate to settings
- check for update & install
if there is no update available it was suggested to write homatics support
I still need help and have read all the Guides and FAQ thoroughly
You may polity ask your Question in the official Support Thread
Remember:
- it is a Project run and build by Volunteers
- Prior to posting an error: Read how to post logs
- try to search the Thread if your Question may be awnserd before
Thank you all<3
@pretoriano80 for the Original Guide
@vpeter for the permission to write this as a Wiki Template
and all the other supporting this project
CREDITS : All credits go to their respective owners.
//edits:
20230805 formatting & fixes